Username
Password
Remember Me
Log in
Forgot your password?
Forgot your username?
Forgot your username?
How to manage customers and groups in Magento 2 |
| Magento 2 Extensions |
| Written by ITORIS Team, 2018-07-27 |
|
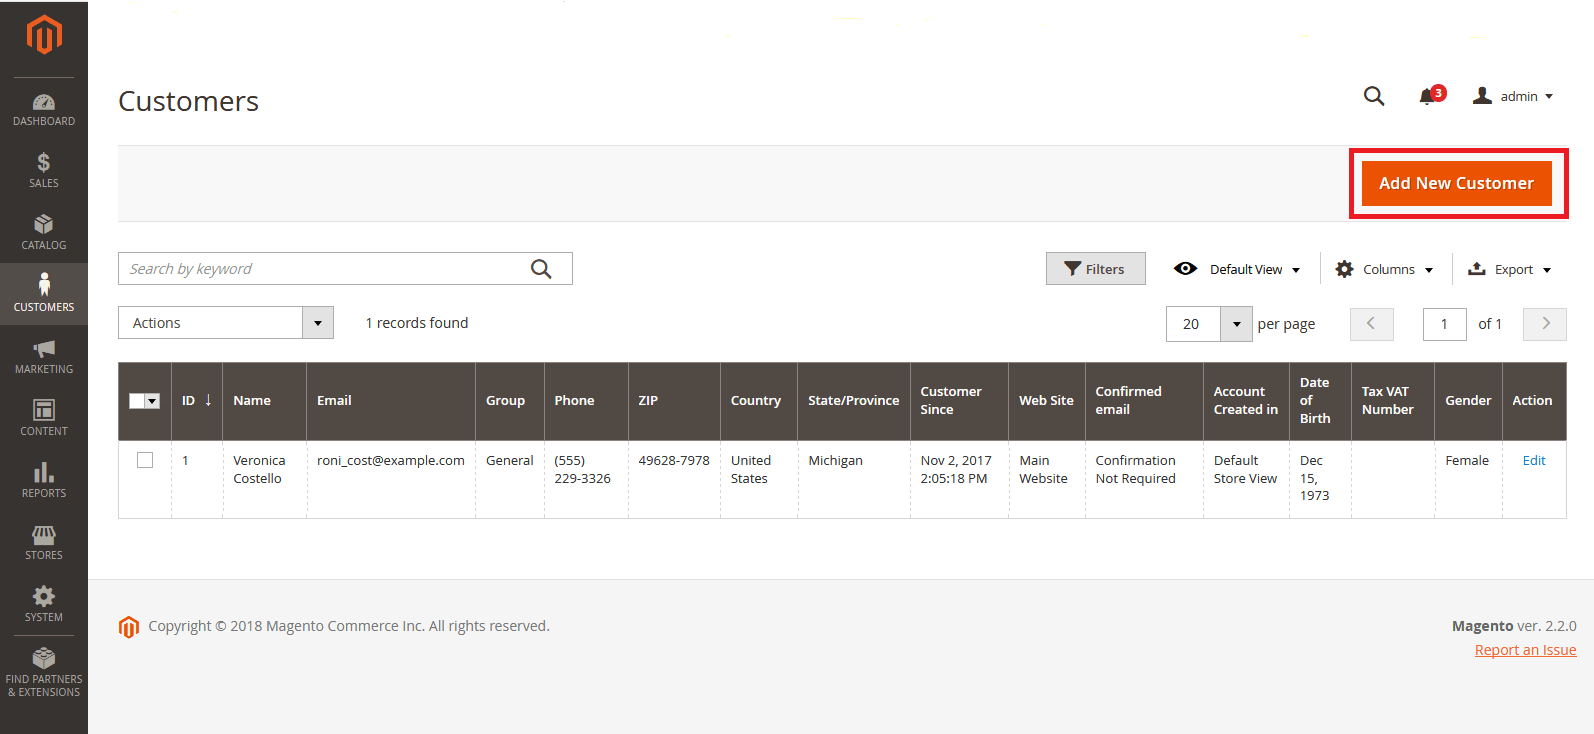
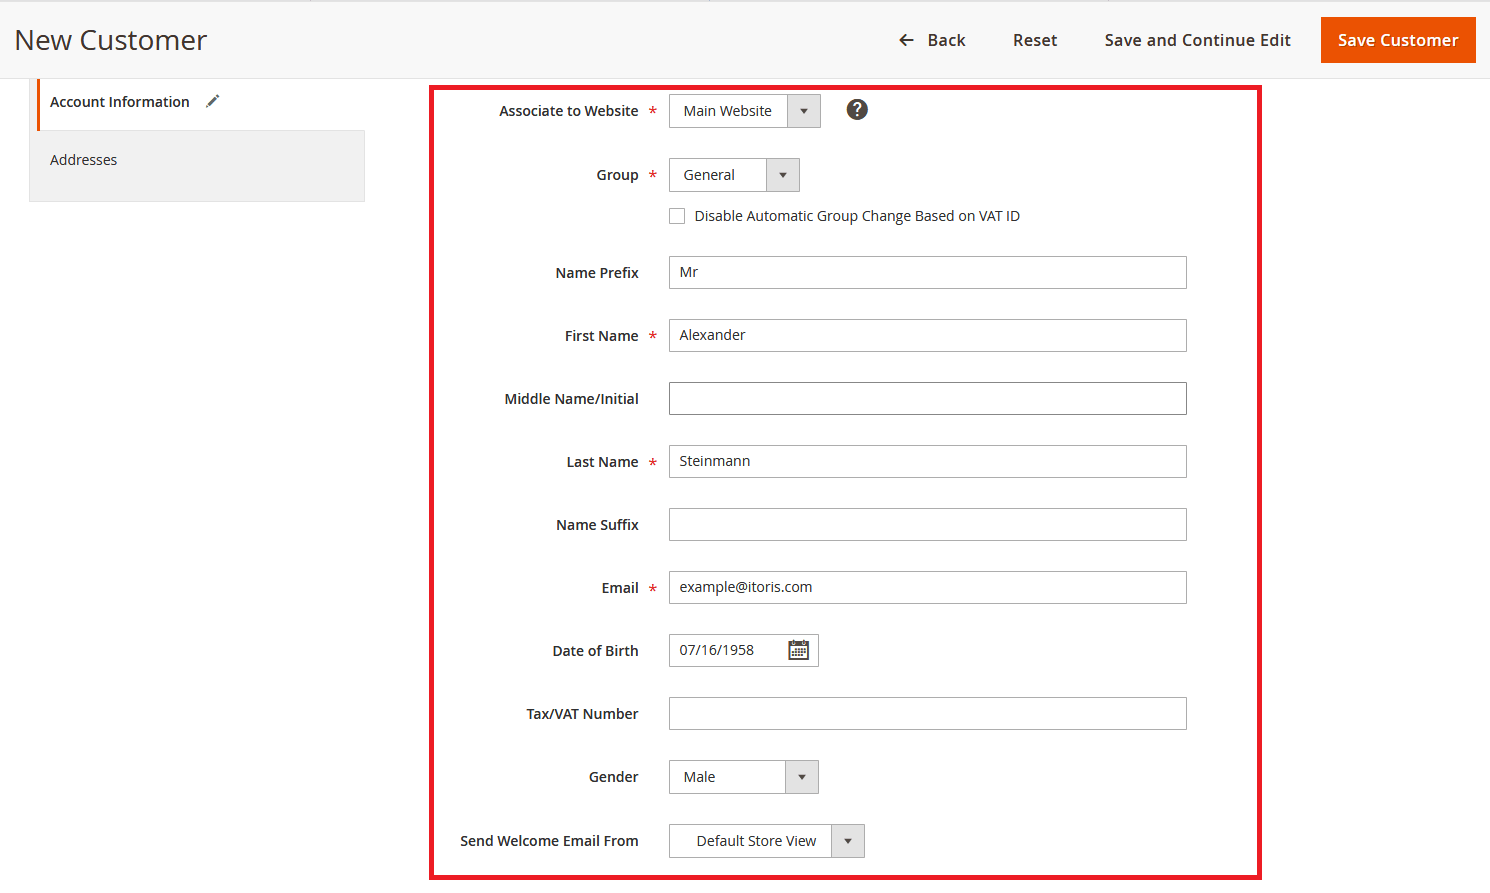
Separating your customers into different groups according to the different characteristics such as geography, hobbies, age or gender is very important. Doing so would allow business owners to target their products and services to the right kind of people; therefore increasing the latter’s degree of satisfaction and its own profits. How to add a new customer in Magento 2 from BackendTo add a new customer in Magento 2, you’ll need to: Step 2: Click the Add New Customer button located on the top right-hand corner of the page:
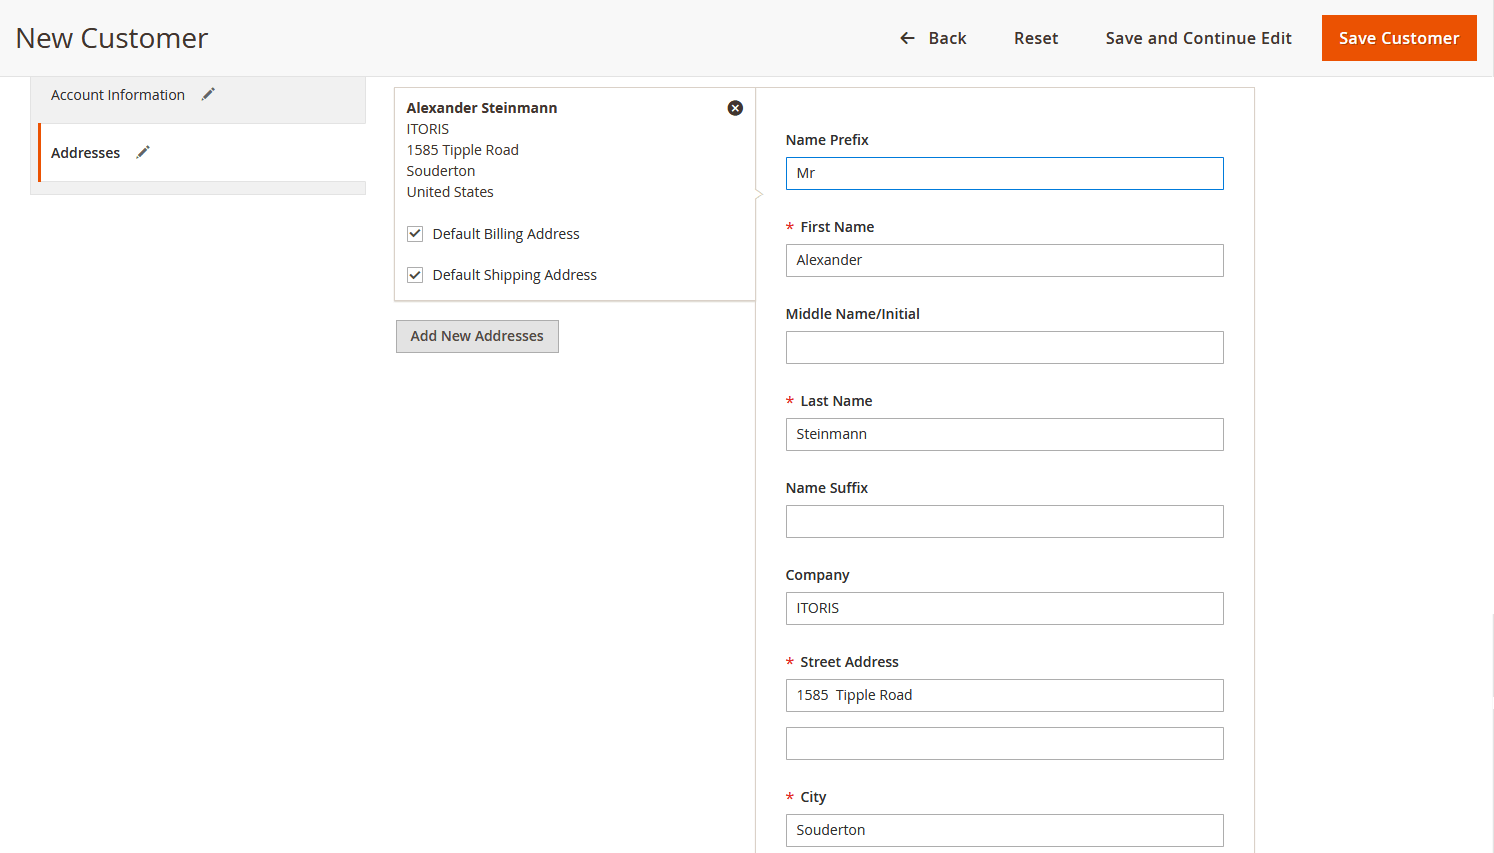
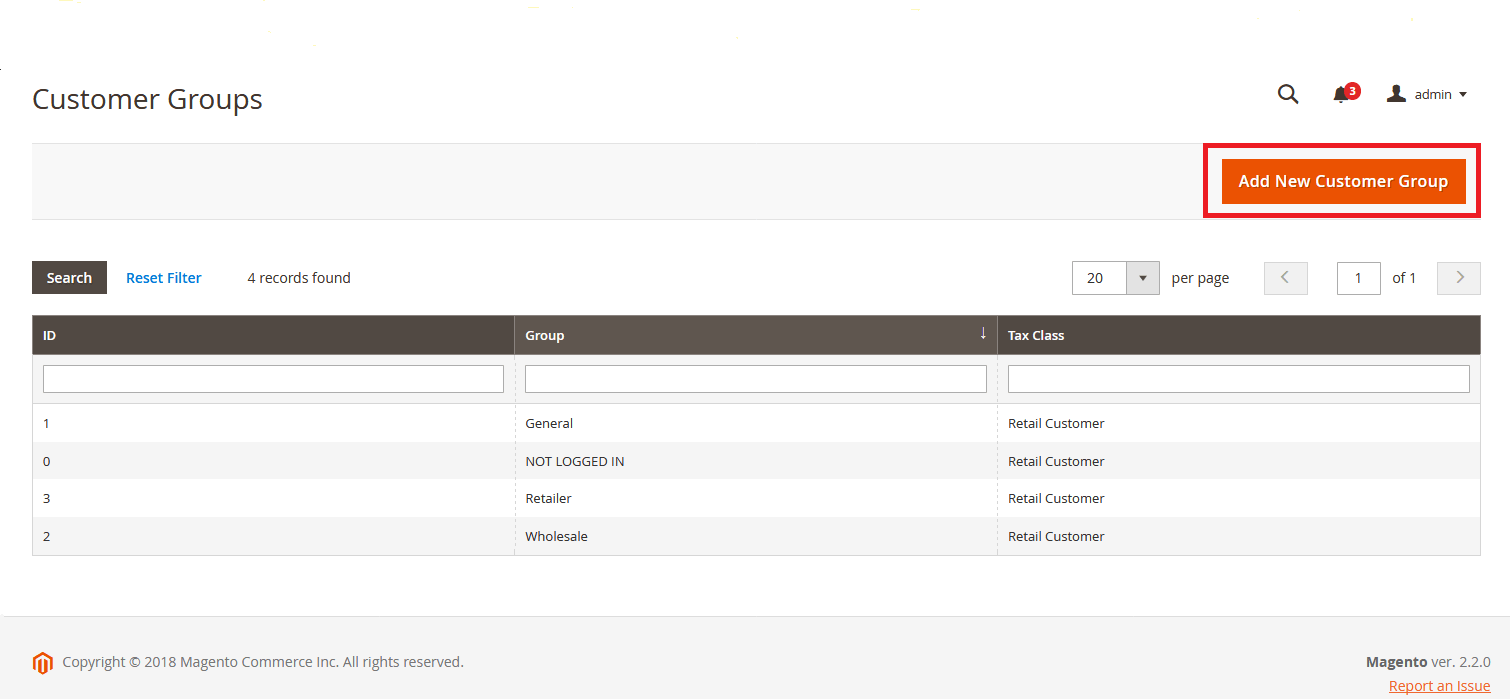
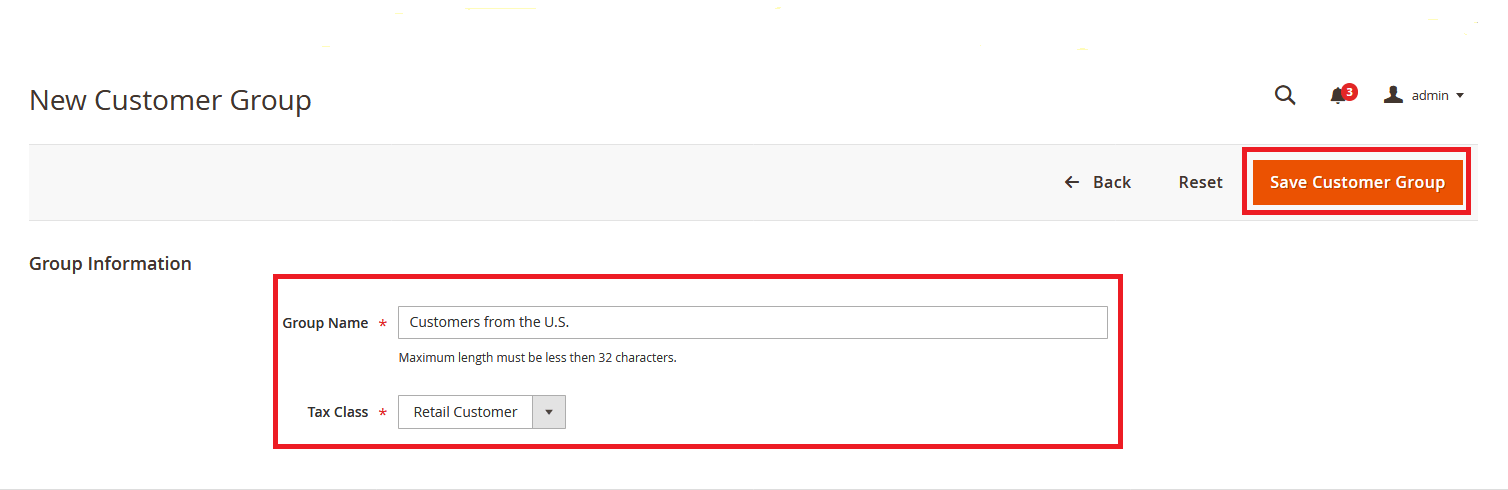
Step 3b: In addition to specifying the necessary Account Information, there is also an option to add both billing and shipping addresses for the customer in the Addresses tab: Click the Save Customer button once all the necessary information has been filled in. How to add a new customer group in Magento 2 from BackendFollow these steps in order to add a new customer group in Magento 2: Step 2: Once you’re there, you’ll need to come up with a Group Name using a maximum of 32 characters and choose a specific Tax Class. Don’t forget to click the Save Customer Group button to save the changes: |