Username
Password
Remember Me
Log in
Forgot your password?
Forgot your username?
Forgot your username?
How to Change Customer Sidebar Menu in Magento |
| Magento Extensions |
| Written by ITORIS Team, 2018-10-16 |
|
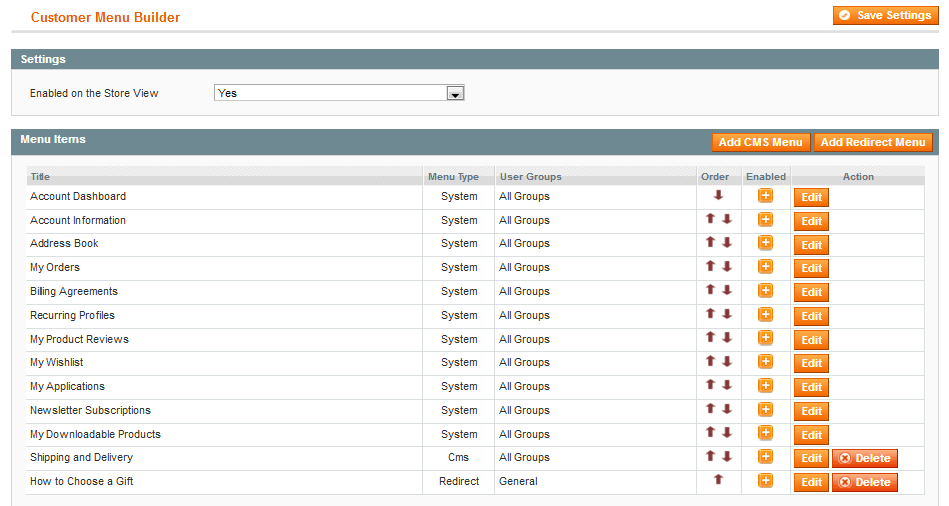
It's vital for online stores to have intuitive and well-organized menus and help customers find the information they are looking for. Thus by giving access to the information about products, promotions, or latest collections you will definitely turn your guests into potential customers. By default, you can place information everywhere on your website including banners on product pages and catalog pages, or redirecting the users to specific CMS pages on the Homepage. Now you can also reach out to your customers directly through the advanced customer sidebar menu navigation. All the customer’s details, orders, favorite products are stored on the customer’s Dashboard. Using the Customer's Menu Manager extension for Magento you can edit or add new sections to the menu. Thus all the necessary and important information will be stored in one place. To customize the default menu of your website, you need to go to the Backend, click System > ITORIS Extensions and then Customer Menu Builder. There are 3 types of custom menu: System menu, CMS menu (you can add any content using WYSIWYG) and redirect menu that will redirect the customers to a certain URL.
The list of all menu items in the Backend
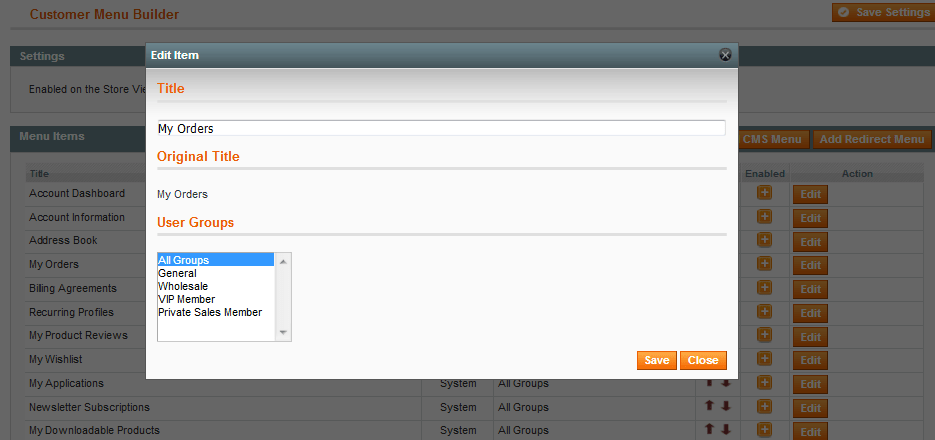
How to Edit System MenuThe system menu contains the menu items available on the customer's Dashboard by default. Please note, before editing the system menu you need to log in the Frontend as a customer. You can’t remove the system items, but you can disable or edit them by clicking the “Edit” button. In the appeared popup you can change the title or choose what customer group will see this menu item.
How to Edit System Menu Items in the Backend
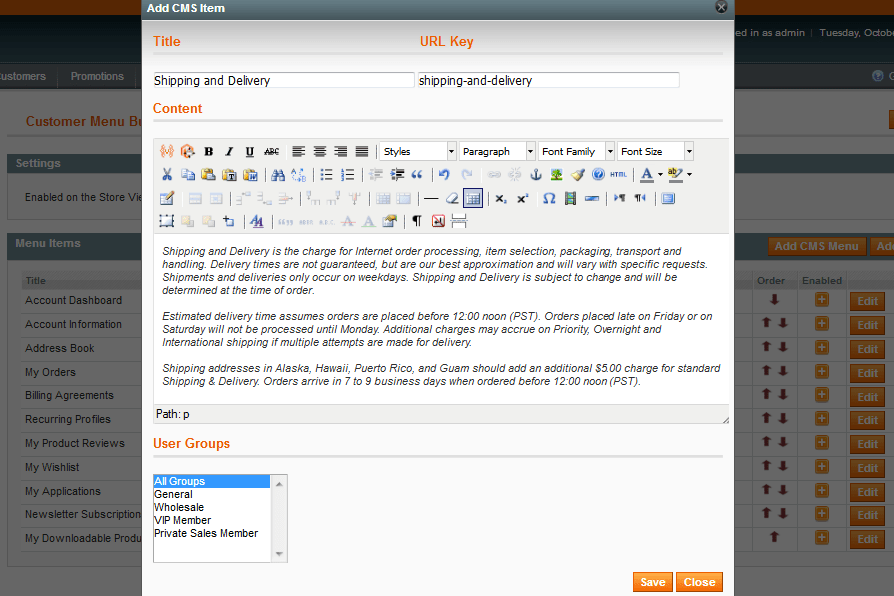
How to Edit CMS Menu ItemsThe CMS menu shows the menu items that you can create using the built-in WYSIWYG editor. You can add any kind of information like special promotions, delivery details, terms and conditions, and so on. Thus all the important information is stored in the customer account. To create a new CMS menu item, click the “Add CMS Menu” button: 1. Enter the name of the menu item your customers will see on the Dashboard. 2. Enter the URL of the new page. 3. Create any content, for example, adding texts, images, links and so on. Please note, you can insert the widgets as well. 4. Select what customer groups will see the menu item on the Dashboard.
How to Add CMS Menu Items in the Backend
How to Redirect MenuThe Redirect menu item redirects the customer to another page on the website or external website. To add a new Redirect menu item, click the “Add Redirect Menu” button: 1. Enter the name of the menu item your customers will see on the Dashboard. 2. Add the URL the customers should be redirected to after this menu item is selected. 3. Specify what customer groups should see the menu item.
How to Add URLs to the Customer's Dashboard |